In March 2020, about one month into the COVID19 lockdown in Canada, I decided that it was time to resurrect that old hobby of mine – playing video games. I am not a serious gamer, I am not a competitive gamer but I enjoy certain games. Back in the day, I completed the full game of GTA Vice City and loved it. I loved that you could drive a tank, shoot at the cops and even commandeer a police helicopter. I also loved the in-game radio stations and those radio stations were how I discovered several metal bands including Iron Maiden, Judas Priest and Slayer. The Vice City radio stations were also my first introduction to US talk radio and some of the insanity that people peddle via AM radio “flamethrowers”.
Besides Vice City, I loved playing the Fifa football series, mostly because I loved football. Some of my friends owned PlayStation 2s or Xboxes but PC gaming was for me. There was a certain thrill to playing a game that was not supposed to work on your system, because your hardware was too old or too weak.
Back to 2020. Via reddit, I discovered that several game studios were handing out free games and I created an Epic Games account solely for the Tomb Raider giveaway. That was the first game franchise that I recognized, so I had to see what the new games were like. Very good. I downloaded the game and started playing on my 2015 Thinkpad, and the experience was mediocre. The laptop hardware was old and not designed for gaming. I had to get a better tool for the job so a gaming computer it was. True to my Indian heritage, I scoured Farcebook and found someone, relatively far away from our home selling a used PC. At the time, I had not owned a PC for almost a decade and only used laptops and I had no idea how to decode hardware specs. Ok, the inter webs and YouTuba had the answers, but the answers would take hours of decoding and understanding to be useful. So I decided to just buy the computer and figure it out from there.
I ended up with an AMD Zen 2 processor which was relatively ok for the time and an AMD RX580 graphics card. At the time, I had no idea what any of this even meant so I fired up some games and decided to see how they worked. They worked well! So well that I decided to make my first game purchase on Steam, incidentally the first game I bought legally and digitally. To be clear, I had purchased games in the past, just on CDs and DVDs. This time, I paid for Assassins Creed Origins and had a blast with the game. It looked amazing, the game was enjoyable and I loved the ability to switch between a controller and a mouse depending on the situation in-game. Eventually, I bought more controllers, a $ 50 PS4, a PS Vita and finally a Steam Deck. Gaming during the pandemic was excellent. I played a few online games, lost Fifa football matches to kids in Brazil and India, and even resumed playing Age of Empires!
I love PC gaming. I love the options it gives you and the fact that piracy is still possible. Piracy, however, is not strictly necessary. My Stream library includes about 10 games that I purchased over the last five years, all on sale. My Epic Games library includes hundreds of games, none of which I’ve paid for. Yes, all free. I can play these games on the computer, on my Steam Deck and even stream them on my iPad. Really amazing value, great enjoyment and I recommend that you also become a PC gamer. There is a game for you. There is a game for everyone.
If you live in Ontario, Canada, the electricity regulator – the Ontario Energy Board – sets
your electricity rates and plans
. Electricity rates are based on two factors – how much electricity you use, and/or when you use it.
Each electricity plan offers different options for both factors. You have three options in 2025 – tiered rates,
time-of-use rates and the newest option – the Ultra-low overnight rate (ULO). The ULO rate could be cheapest
if you own an electric vehicle and drive a lot. The exact EV usage amount when the ULO rate is cheapest depends
on how much you drive and your charging requirements, i.e. when you need to charge your car. Most of my charging
is overnight and the ULO rate offers a significantly cheaper option for this period. However, the ULO rates include
periods during the evening when electricity rates are higher.
What this page does:
Use this page to estimate the cheapest electricity billing option for you. You must
provide at least one week of electricity usage data in a CSV file. The calculations below
use your hourly energy usage to calculate two typical days of electricity usage – a weekday
and a weekend day.
In my case, I own an EV and am trying to determine whether the ULO plan is the cheapest
option.
⚠️ Important:
The input file is NOT the Green Button format. Please use a CSV file.
⚠️ Privacy Notice:
All calculations are carried out on your computer. No data is sent either to me or to
anyone else. This page uses CSS from UNPKG.com.
The chart uses the Chart.js library. If you do not recognise these words, don’t worry.
No data leaves your computer and you can use this script entirely offline.
I created this page using AI (MS Copilot). I verified that the calculations for the
Tiered rates are correct for summer and winter. I did not verify the calculations for
TOU and ULO rates but the cost estimates do appear plausible.
Instructions:
Visit your electricity utility’s website and download your usage data as a
CSV file. Make sure to download at least seven days of data. Save this somewhere on your computer.
Below, click “Browse…” and find the energy usage CSV file on your computer.
Click “Calculate”.
The chart below will update and show your average energy usage for a typical
weekday and for a typical weekend day. Note that both lines in the chart represent one day each.
Select the season – either winter or summer rates.
Select your pricing model and click “Calculate Cost”.
I designed these calculations for Ontario’s electricity rates. The CSV file you download from your utility should start like this:
Date
Hour 1
Hour 2
Hour 3
2025-09-01
0.42
0.38
0.45
2025-09-02
0.40
0.36
0.43
⚠️ Not working yet:
The sliders for hourly energy consumption do not work. The values at the moment are from
your electricity usage file. The eventual idea is that you can modify these values to see how
your electricity bill changes. For example, these should allow you to answer questions like
“What if I charged my car starting at 11 PM instead of 7 PM”. At the moment, these sliders do nothing.
During the COVID-19 pandemic, I had my first taste of working from home. I did work remotely in the past, but this was my first sustained stretch working from home. I realized a couple of things very quickly. One, that paying for a quality chair is a good idea. Two, that paying for a quality sit-stand desk is a similarly good idea. Finally, that if you are not physically in front of people, having a quality image of your face on their screens is an excellent idea.
I’m old enough to remember film cameras. I vaguely remember my parents owning disposable point-and-shoot cameras as well as a couple of cheap Nikon film cameras that eventually broke. I don’t actually remember much about the cameras themselves but I was intrigued by the batteries. I do not remember the exact model but they were definitely not AA or AAA batteries. They were something different. I also remember the photos after they returned from the studio – soft focus, often washed out colours, grainy. At the time, that was the best we had so I just accepted it.
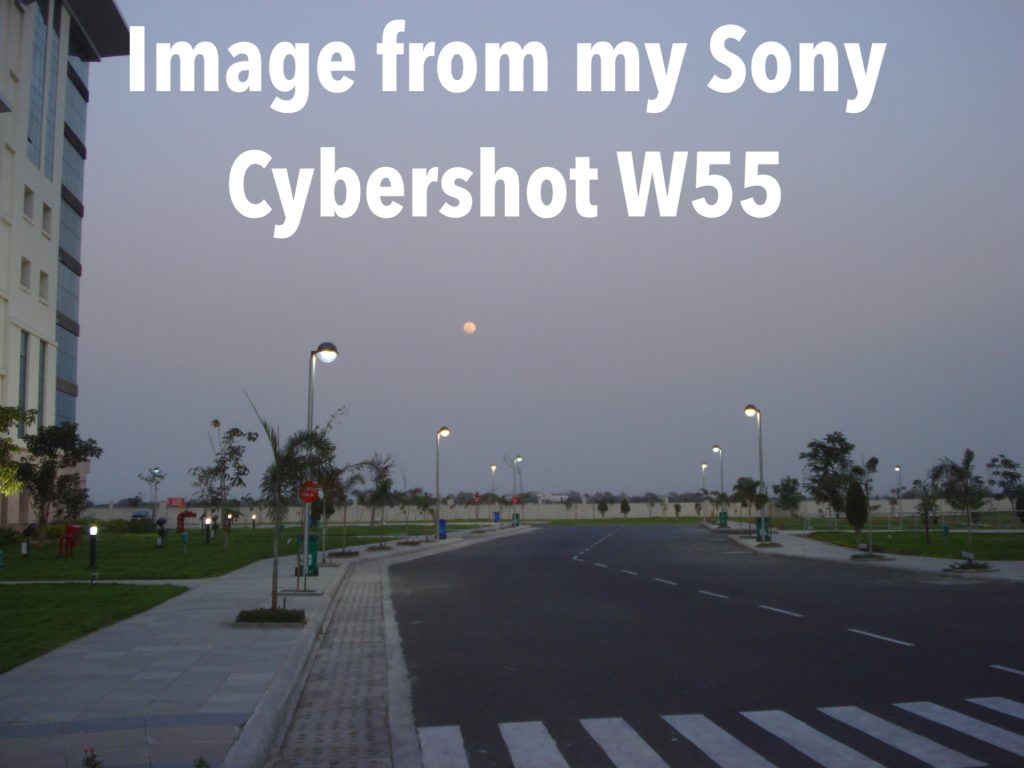
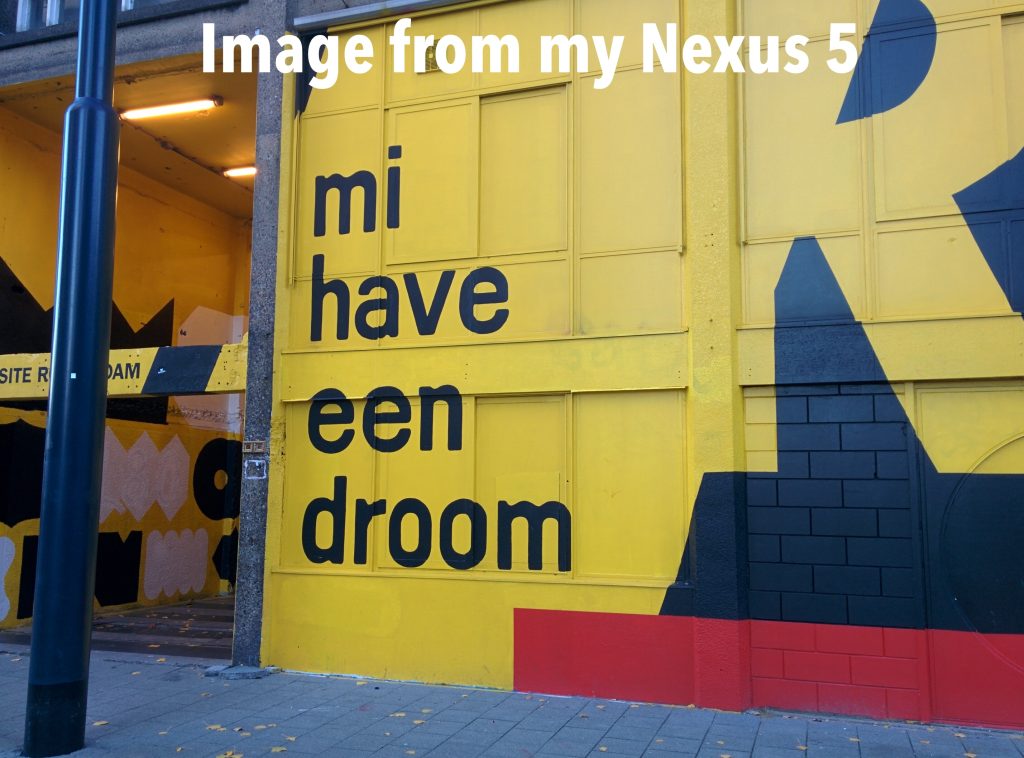
Eventually, my dad bought a Sony Cybershot DSC W-55 digital camera. This was the mid 2000s and was during the brief interval in my life when I didn’t read product manuals. I had no idea this was a mirrorless camera. I also had no idea what W and T meant on the zoom rocker. In my defence, zoom in and zoom out make more sense. W and T stand for Wide and Telephoto respectively, but the average person will not make that connection. Anyhow, the camera manual did describe this, as I recently discovered in the year of our Brahma 2025. I would set the camera to auto and hope for the best. It survived Mumbai’s trains, Rajamundhry, Baroda, Helsinki, Stockholm and finally Utrecht. Often, this camera did a pretty good job. I kept this camera between 2007ish and 2014, when the battery died. It was a pretty good camera, certainly producing better photos than any phone camera I had at the time. My phones were cheap Nokia models and eventually, a Nexus 5. I just abandoned the camera one day, deciding that I was better served with my phone.
That changed. And how. During the pandemic, I realized that the tiny webcam in my laptop produced horrible quality video. I also realized that the lack of focus meant that too much of the scene behind me was in focus and that the webcam software made me look white. In fairness, pardon the pun, I would love to navigate the world as a white man, but I am not a white man so a camera making me look whiter than I am is insulting. This led me to buy a cheap webcam – a 1080p Logitech model that was incredibly popular during the pandemic, when everyone realized that laptop webcams are terrible.
There is a reason I studied engineering and that reason soon came to the fore. I had to know WHY my laptop camera was so bad, WHY the webcam was better but not better than the streaming setup of some Twitch streamers. I also had to know what a DSLR was and how I could achieve that beautiful background blur on my video calls. I started reading camera manuals and soon discovered the reason I started but stopped reading the manual of my first Sony camera – these manuals assume that you already know the jargon of photography. If you are reading this, do you know what an f-stop is, what aperture is and what focal length is? Do you know how each of these interact with ISO and exposure length to produce a certain image? I did not and even now, I barely understand these terms. I have read extensively about them and I do know a few things but I am far from an expert. Camera manuals were written for experts.
The answer to why certain cameras are better than others boils down to physics – the physical area of the image sensor. A real camera has an image sensor around an order of magnitude (10X) larger than a typical phone camera. Similarly, a phone camera’s sensor is larger than the webcam sensor, which in turn is larger than your laptop’s camera. That’s it. Phone cameras do try to compensate for smaller sensors with software trickery, a process called computational photography. There remain, however, laws of physics that cannot be broken hence why a picture taken on a phone looks nice on the tiny phone screen but as soon as you print it out, it looks terrible.
This motivated me to invest in a real camera and to repurpose it as a webcam. The Indian in me scoffed at spending thousands of dollars on buying a new camera so off to the used market it was, specifically, Facebook marketplace.
I did my R&D and discovered that something called “clean HDMI output” was desirable so I bought the cheapest Canon camera I could find that provided clean output, a Canon T3 from 2011. I bought this in 2021 so, at ten years old, it was already obsolete. This camera came with the kit lens, a term used for the cheap lenses that manufacturers bundle with the camera body. It also came with multiple batteries and chargers, neither of which I needed. I needed a way to get video from the camera into my computer. At the time, Canon provided free software called EOS Connect that used the USB port on the camera to stream 720p video from the camera. This was already much better than my tiny Logitech webcam and I was thrilled.
Soon, however, a new problem emerged – my audio came from an external mic, not from the camera. The dated processor on my camera meant that the video and audio were out of sync. Worse, this was not an easy problem to fix in Zoom or Microsoft Teams. What to do?
I decided that the solution was a USB capture card. Essentially a device that took the HDMI video from the camera and streamed that to my computer, without Canon’s Japanese trickery in between. This worked well until I realized that I did not want people seeing my Shinkansen model trains behind me, lest those same people think that I was a transit-loving Socialist (I am).
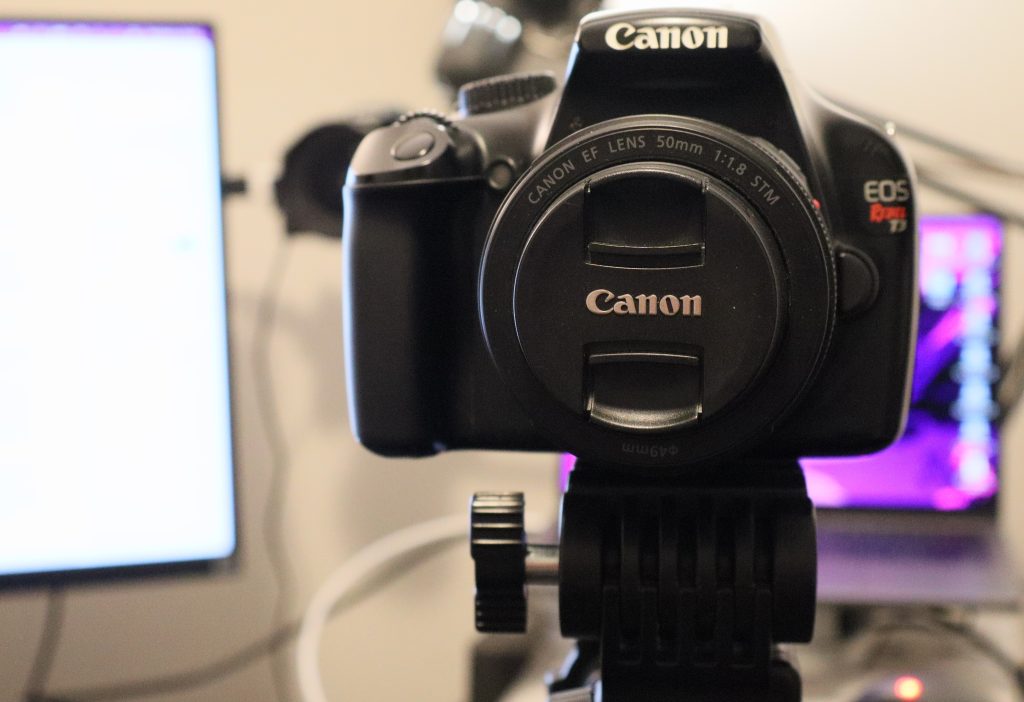
I went on the inter webs and to YouTube this time. Dear reader, YouTube is not a reliable source of information at the best of times, and relying on it for nuanced technical information is a bad idea. I surmised from several videos that I needed a better lens and a lens that let in more light would make me look like a video game streamer on my video calls. So I bought a lens with a focal length of 50 mm and a wide aperture that let in a lot of light. I plugged that into my camera, placed at arms length in front of my face… and realized that I now had a very high quality image of my nose with a blurry background. You could choose between seeing one of my eyes or my nose or my misaligned front teeth. The knowledgeable among you already know the problem – the higher the number attached to the focal length, the more zoomed in the image is. This was my first mistake.
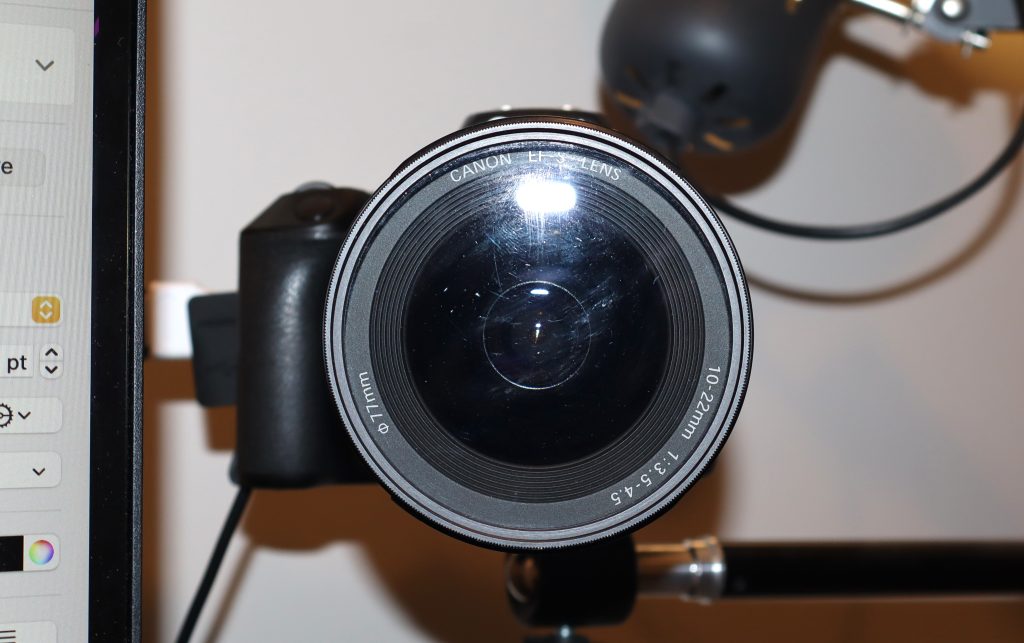
No matter, back to the inter webs I went and discovered that I needed a lens with a smaller focal length, ideally around 18 mm. At this time, I finally decided that I needed a better camera, ideally with autofocus in video mode, so I went back to Facebook bazaar and found a Canon SL3 for $ 400. This is a 2019 model and among the last DSLRs that Canon made. Found hundred Canadian dollarydoos was a lot of money for a webcam but I decided that if I was doing this, I would do it the right way. I then embarked on a quest to find an 18 mm lens and I eventually did find one, an older Canon zoom lens rated for 10 – 22 mm. Good enough for a webcam. This is the set up I still have and it works well. So well that I never move the camera or the capture card or the camera arm. It just sits there as I work. The only thing I do is switch the camera on or off as needed.
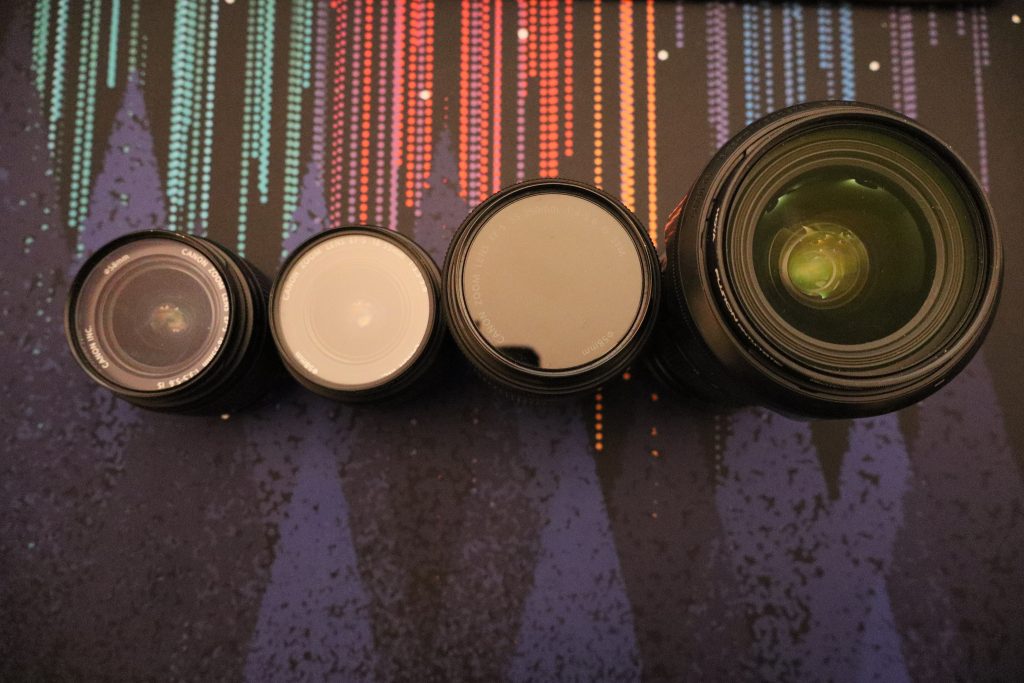
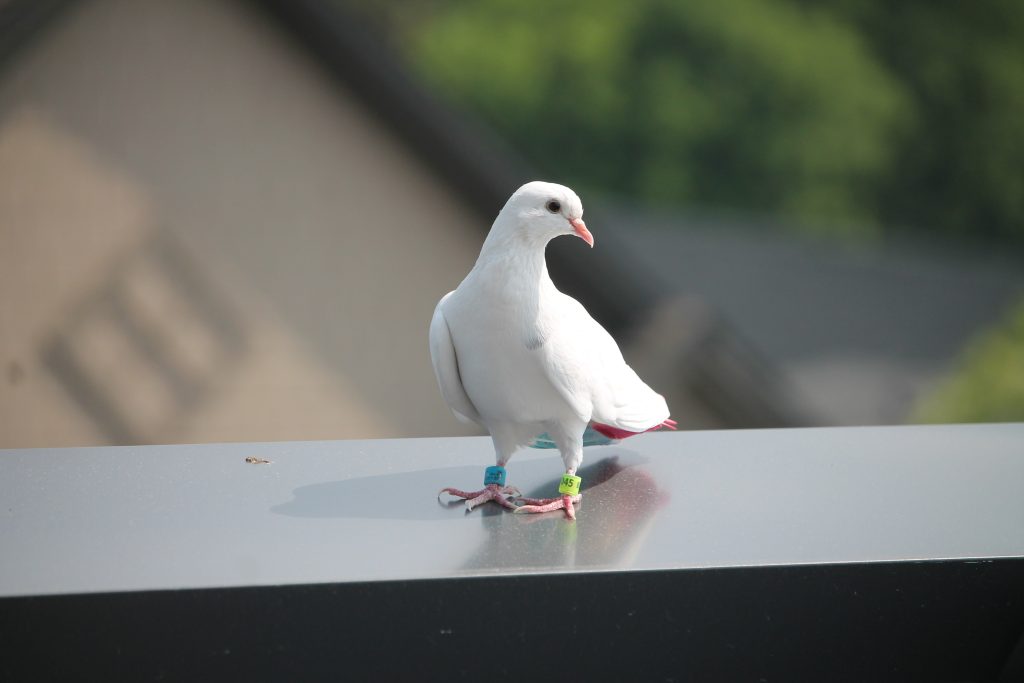
You likely noticed the list of equipment in the penultimate sentence there. Yes, I now owned a tripod, a camera arm, an HDMI capture card, two DSLR cameras, four lenses, a dummy battery for each camera. And this was only the start. Eventually, I decided that I liked photography combined with my hobby of fixing things so I bought a “broken” zoom lens, technically a telephoto lens but that word sounds esoteric. Like the word esoteric. The lens wasn’t actually broken, only one of the communication contacts was rusted. I cleaned the rust, cleaned the glass and I had a new lens. I used this to take pictures of birds and my mortal enemies – rats in trees, more commonly known as squirrels.
By this point, I decided that I liked taking pictures that would stand the test of time so I needed a travel camera. I scoured Facebook marktplaats for months, scoffing at the thousand-dollar price tags of used mirrorless cameras. Ah, the mirrorless craze. This meant that many amateur photographers, convinced that the mirror in their camera was the only thing standing in the way photographic greatness, were looking to sell their old camera gear. This is how I found amazing deals on my existing cameras and older Canon lenses. This time, though, I was in the market for a mirrorless camera myself and I was unwilling to pay the high prices they commanded. Eventually, I found a cheap Canon R100 for $ 450. It was small enough that I could carry it everywhere and that is exactly what I did. The internet will tell you that this is a cheap camera for a reason – Canon cut too many corners. No articulating screen, older processor, and so on. It doesn’t matter. It really doesn’t. I primarily set this camera to auto mode, let it do the maths and I just take photos. On Canon’s own website, this model is the #2 or #3 best selling camera.
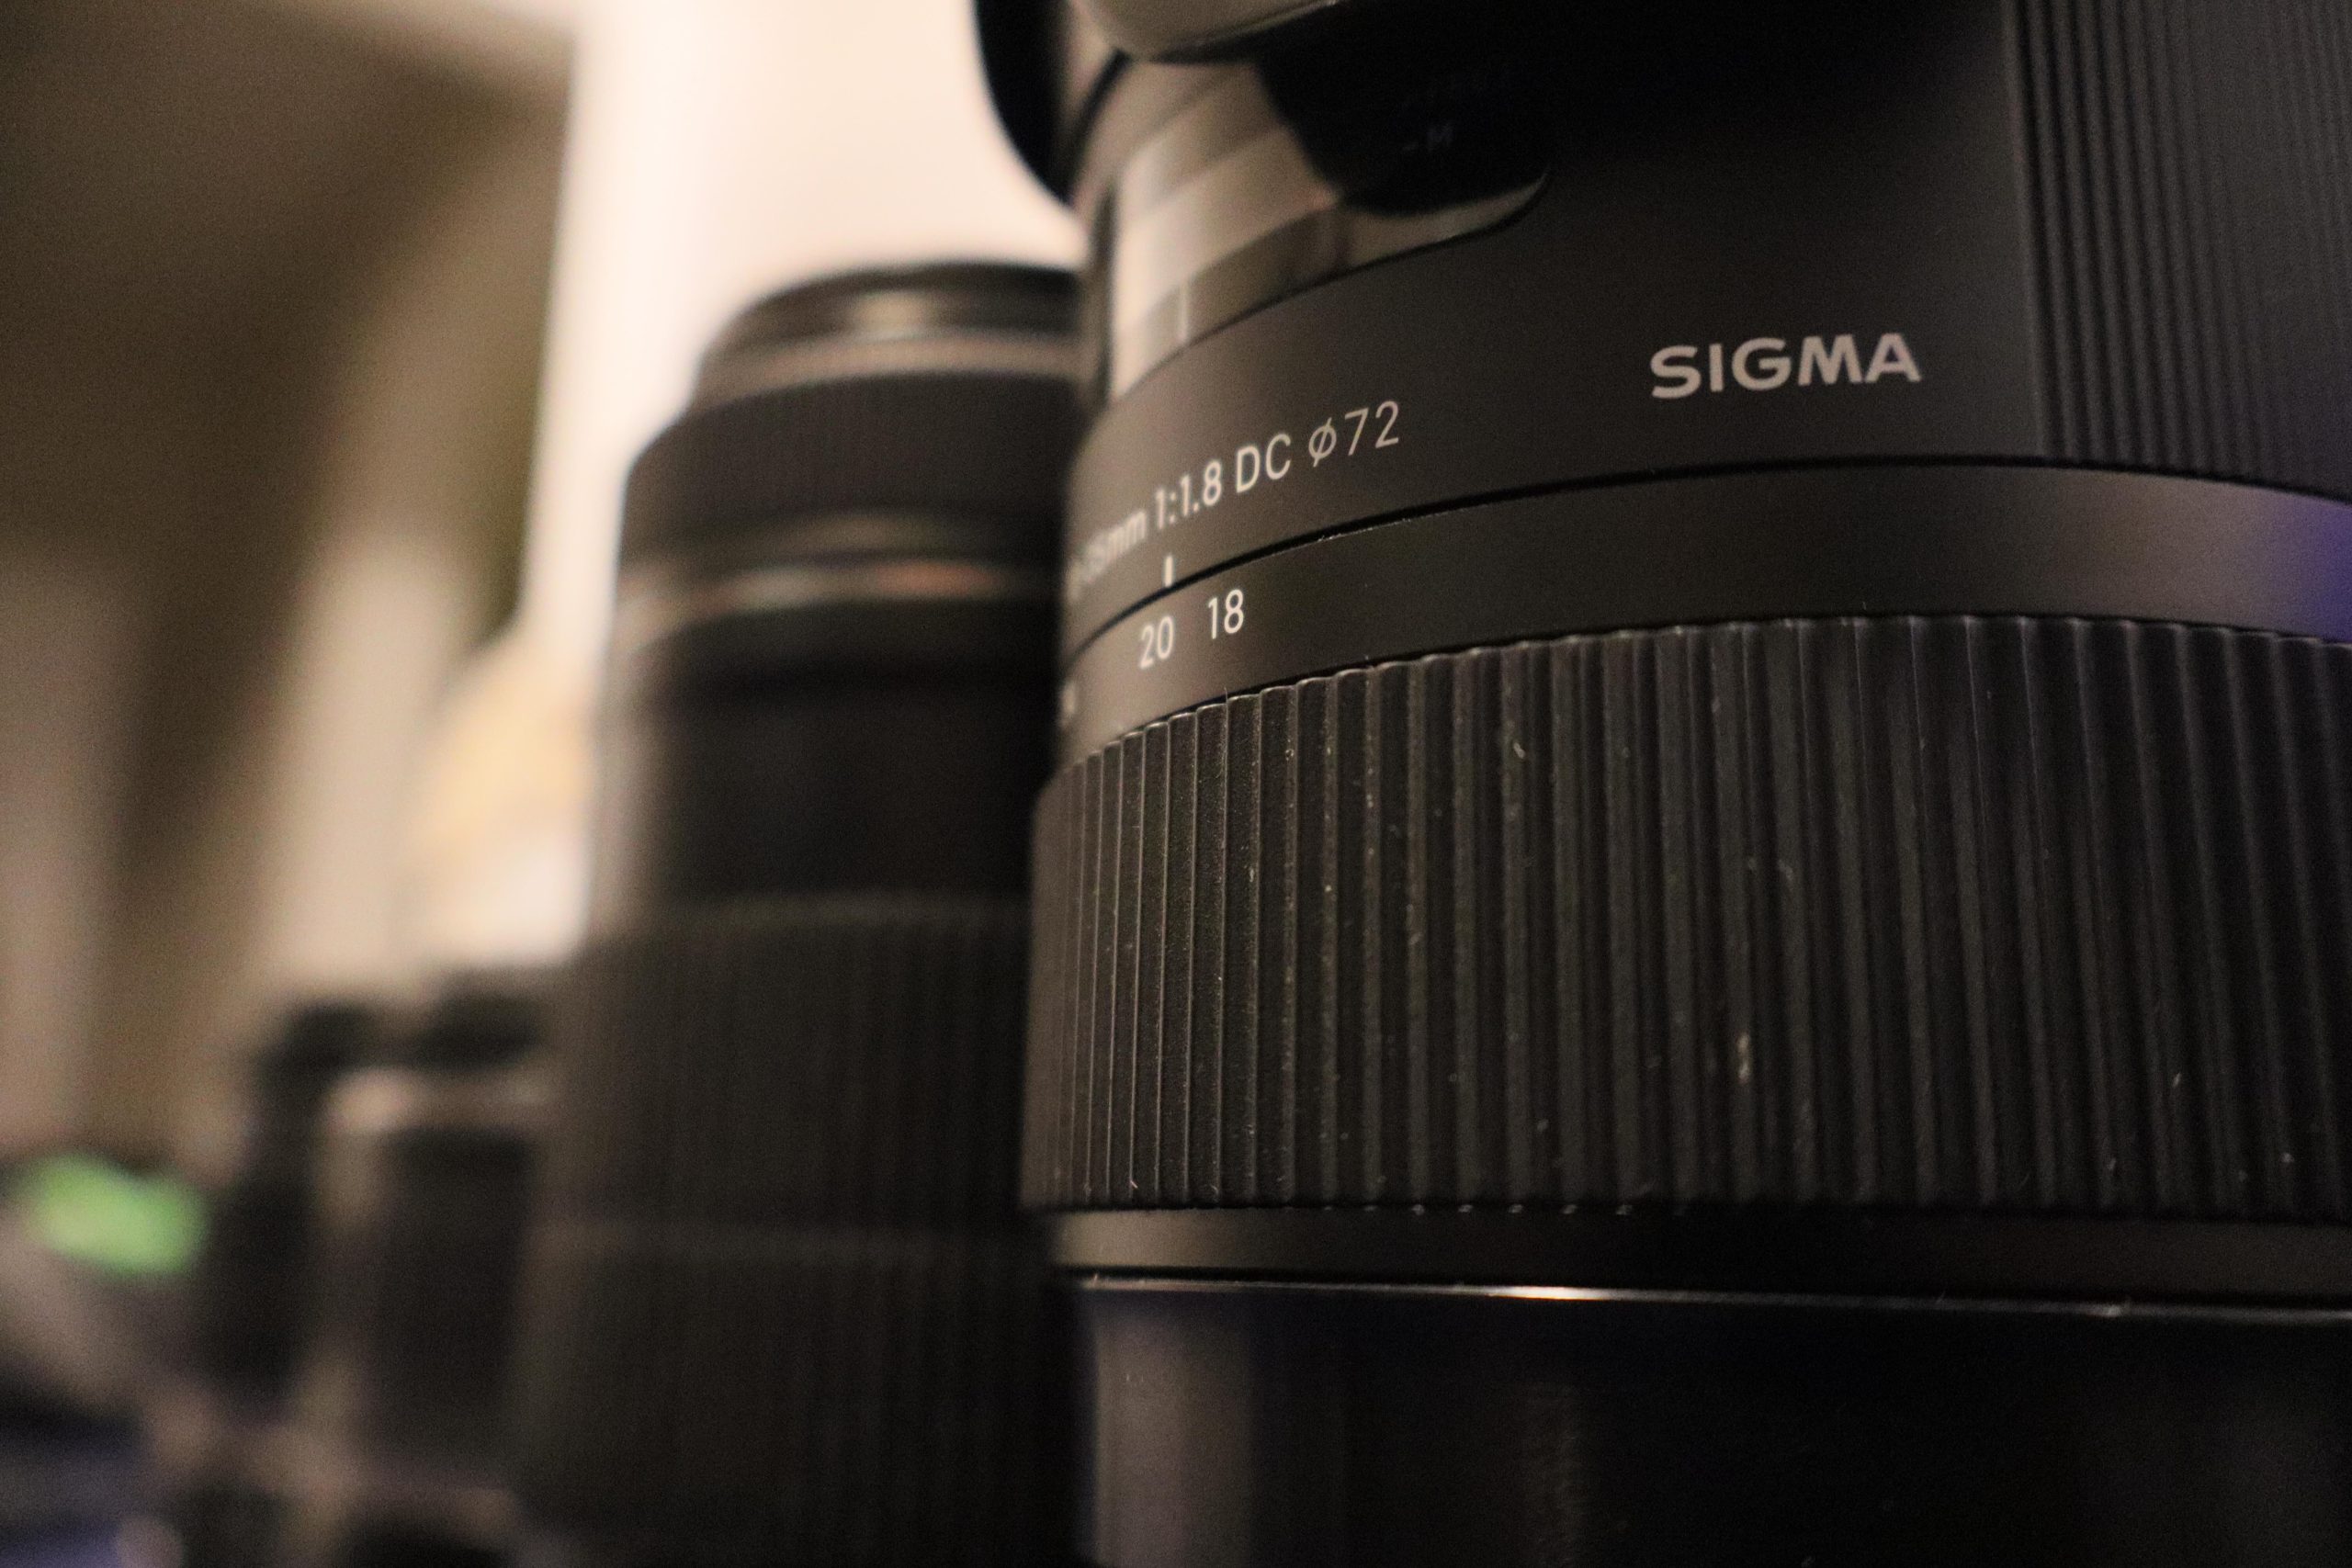
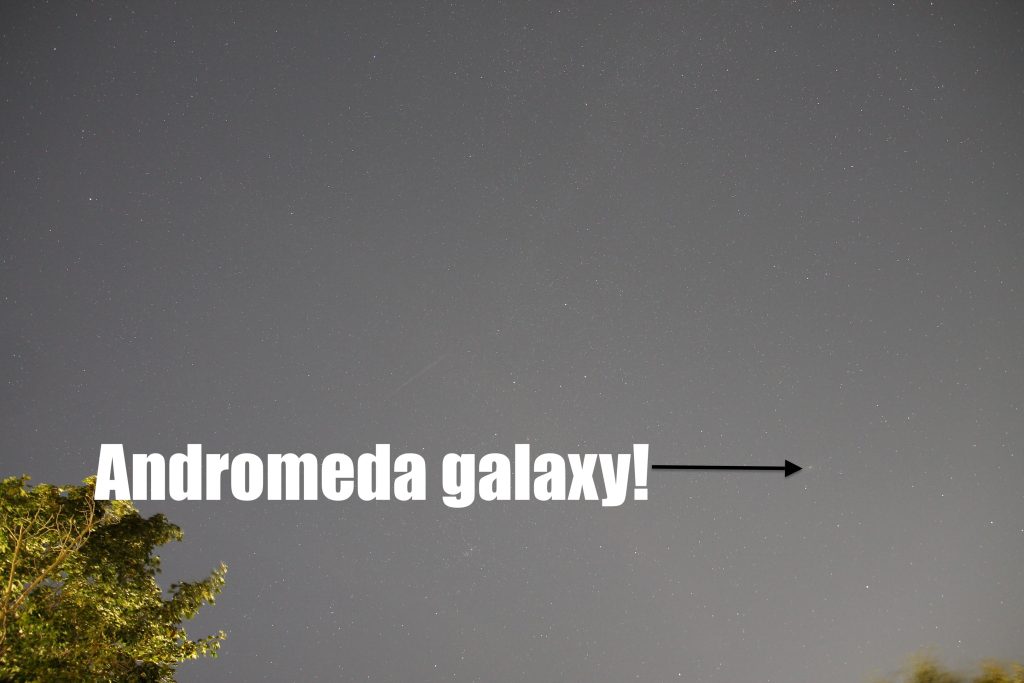
Later, I decided that I wanted to take pictures of the sky (the aurora and the milky way) so I needed a proper lens. “Proper” implies expensive and I eventually bought a Sigma lens for $ 500. The price tag when new was $ 1,300 Canadian dollarydoos. This remains the single most expensive piece of photography equipment I have purchased and I expect that record to hold for at least a few years. When I stood at the CIBC ATM withdrawing cash, I cried a little inside. This lens, however, produces some stunning images. A pity that I don’t know what I’m doing and so I rarely take any stunning images. Still, I can photograph the night sky and a lot of stars, and even the Andromeda galaxy! This brings me joy.
I will conclude with this – yes, your phone can take some pretty amazing images given its compact size. Yes, the best camera is the one you have with you in the moment. But, if you want images that you can print and frame as memories, ones that look like real moments, with real people, with imperfect faces, you should buy a real camera. I have many images saved over the years. When I recently printed a few, every single image from my various phones looked like rubbish. Why? Either the resolution was too low or the “computational photography” produced weird skin tones, strange patterns or just a blurry mess as the computer tried to guess what reality looked like. I don’t care if the Google or Apple engineers produced an AI model that guesses accurately. I don’t want a guess, I want reality. My skin isn’t perfect, neither are my teeth and my photography skills are far from good. But I don’t care. Auto mode is good enough, but it is only good enough on a real camera.
PS – the table shows the cost of every single piece of camera gear I’ve purchased over the past three years. It adds up to $ 2,095. I am certainly not happy with that amount but I must remind you – Canon will charge you double that for a single RF-mount lens. Not the camera, just the lens. Yes, a very good lens, but still, that’s over $ 4,000 for just one lens. All said, I found some amazing deals and am happy with my purchases. I encourage you to buy a real camera, but buy used. Let someone else take the hit on depreciation.
Canon T3 plus batteries, a camera bag and kit lens
$250
Camera tripod
$20
HDMI capture card (Elgato, 1080p)
$120
Camera arm (desktop)
$35
Canon EF-S 10-22 mm lens
$200
Canon SL3 with kit lens
$400
Canon 55-250mm EF-S zoom lens
$60
Canon EF 50 mm lens (f1.8)
$60
Canon R100 camera with kit lens
$450
Sigma Art lens 18-35 mm f1.8 with an EF-RF mount adaptor
Here’s the photographic evidence. All eight of them.
About two years back, I descended down the rabbit hole of Japanese stationery. That led to another rabbit hole of quality stationery products and eventually calligraphy. I now own the full set of Pilot Parallel pens. Yes, my cheap, Indian rear end actually paid full price for these pens and I love them. The mechanical pencils, though, are another matter.
I used mechanical pencils in the past. A cheap Camlin or Bic one. I was always unsure of what the different lead grades were, even after a teacher explained that the letters and numbers refer to a hardness scale. It is difficult to know what you prefer until you try several. A persistent problem I had with mechanical pencils was the lead breaking. I apply a lot of pressure when I write, enough that you can read my writing via the sheet below. I realised only recently that I pressed too hard and that a lighter touch is good for both my hand and the pencil lead.
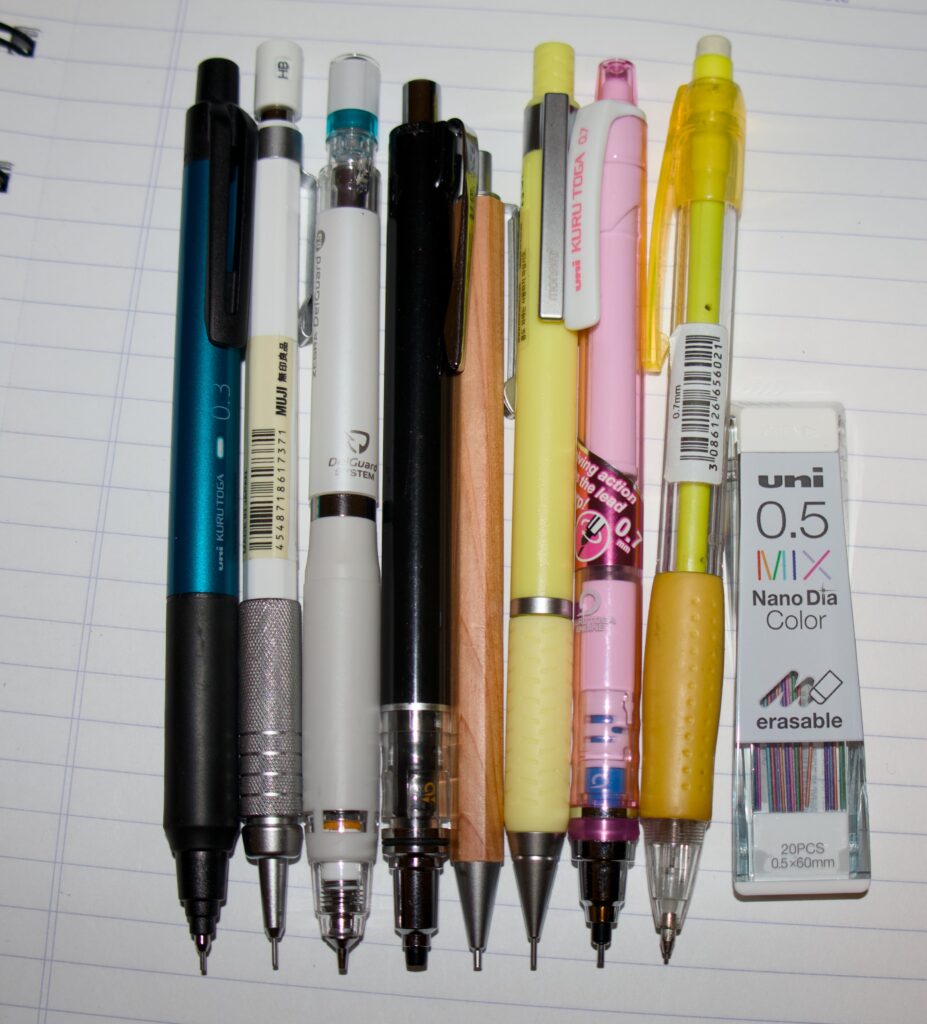
My quest to find a good mechanical pencil led me to try several options. In the photo above are two pencils from Muji, the Japanese consumer goods store. The first was a 0.3 mm balanced pencil and the second was a wooden body 0.5 mm pencil. I like the feel of the balanced pencil, mostly because of the weight and the metal. The lead was a bit too thin for my liking and fragile as well. I tended to break a lot of new lead because I refiled the pencils via the clutch. I would shove the lead straight up the pointy end while I held the other end down. This is not how you are supposed to refill a pencil. You simply drop a new lead into the barrel and keep advancing until the pencil grabs the new lead from the inside. Anyhow, I broke a lot of 0.3 mm lead.
The second Muji pencil was a wood body 0.5 mm pencil. The body was too narrow and with extended use, my fingers kept touching each other and affected my writing. Not the best.
I then decided to buy the Kurotoga (クルトガ) series from Uni, a truly over-engineered Japanese pencil. These pencils have a rotating clutch mechanism that rotates the lead along the shaft, meaning that the lead wears down evenly. No more variable width strokes! The first pencil was a 0.5 mm version. I enjoyed this so much that I bought a second 0.7 mm one and still use that. On a recent trip to Vancouver, I bought a third, 0.3 mm one – the KS model. These really are amazing pencils and I recommend them to anyone who uses mechanical pencils daily. Not the best for kids as they are relatively expensive, at $ 10 each.
During a trip to Korea (South Korea, of course), I discovered the stationery store Artbox. They carry lots of Japanese pencils and I noticed an anti lead-breaking system pencil – the Delguard from Zebra. Zebra are also Japanese and in the true spirit of Japanese over-engineered pencils, this mechanism also works as advertised. Despite my writing pressure, I am yet to break a single lead with this pencil.
While in Korea, I also bought a Korean-made pencil from Monami. I actually expected Monami to mean something in Korean. It’s just the French mon ami, literally my friend. The Gripix pencil I bought was cheap and excellently built. Nothing fancy, just a reliable mechanical pencil in my favourite colour, yellow. Interestingly, this model has a left handed thread at the top. The eraser advances as you rotate and the eraser itself is relatively long.
Finally, I found a set of coloured lead at Amax stationery in Vancouver’s Metrotown mall. Excellent shop with an even more excellent selection. I love coloured lead because I love adding colour to my notes. Graphite-coloured lead is nice, but what’s life without a splash of colour!
Of the eight mechanical pencils I own, I love the Uni Kurutoga ones. The constant stroke width is nice but I do wonder how these pencils will hold up over the years. I discovered that I enjoy 0.3 mm leads, despite the more scratchy feel on paper. I simply use less pressure. If you are tempted to buy one, I recommend the “advance” models as the metal sleeve can retract into the pencil body. This seems inconsequential at first but that metal sleeve can poke holes in your pencil case or your pockets. The Kurutoga pencils are made in Japan, and I am happy to support Japanese industry.
During the Christmas period of 2024, I decided to spend some money (something I try to avoid, in a very Marwadi manner) and bought a scale model F1 car.
Why do I like F1? It is one of the only sports that combines human skill and engineering excellence in equal measure. Pure driving skill will never win a race. Neither will engineering excellence. But combine the two and you have a winner! I’m drawn to the engineering side of the sport. The sound of a V6 revving at fifteen thousand rpm. Yes, FIFTEEN THOUSAND. My paltry road car manages 2,000 rpm but my car is designed for efficiency, not power. The acceleration of a piston to forty meters per second. The aerodynamic efficiency. The science of fluid flow. I love all that. I don’t care as much for the drama that has come to dominate coverage in recent years but the engineering is still there, in the background.
I also particularly like Lewis Hamilton. The only Black driver on the F1 grid and the only person who did not come from money. I admire his grit, his perseverance, in the face of the sheer odds combined with the racism and the abuse. I also admire his willingness to speak about racial issues, especially discrimination, racism and the persistent trend of police abuse.
The model I bought is a 1:18 scale model of the 2020 car that Lewis drove to first place at the British Grand Prix. The race was notable because of how it ended. Pirelli – the tire manufacturer – came under criticism for the performance of their tires. Three drivers faced punctures, and Lewis’s front left tire was the last. This was also the last lap of the race and hence there was no time for a pit stop. Instead, Lewis’ 30 second lead over second place Max Verstappen was steadily eroded as Lewis continued on, slowly. He eventually won, only six seconds ahead of Max. Hamilton drove across the finish line with a flat tire.
The good
This model is large enough that you can marvel at the details and aerodynamic engineering of the car. The accuracy is on point and all the sponsor logos are there, if you care about that sort of thing. The DRS spoiler does not move and the rear tires are mechanically linked. The front tires are not. This is a display model and is not meant to move. The small details are well done. The helmet is accurate, the driver model is good. The angle of the case is excellent, allowing you to view more of the car from the front.
The bad
Some parts are flimsy and poorly cut. The communication antenna on the nose is a flimsily attached piece of plastic. One misplaced touch and it will either bend or break entirely. The display case itself leaves a bit to be desired. The cardboard at the rear feels cheap.
Would I recommend this? Sure. I bought mine from Toronto Motorsports for $ 200 plus taxes and shipping. Full price is closer to $ 300 and I would not pay that price. Lewis moves to Ferrari next season and I wanted to buy a scale model from his time at Mercedes.
Oh and my Christmas present was a bobble-headed figure of Lewis. Much delight.
For reference:
Link to the minichamps website – https://www.miniatures-minichamps.com/gb/f1-2010-2020/915148565-mercedes-f1-w11-eq-performance-44-f1-winner-silverstone-2020-lewis-hamilton-damaged-tyre-minichamps-110200444.html
Yours truly, not realising that I stood directly in front of the camera while it was capturing a long exposure shot of the May 2024 Aurora.One the of most clear aurora shots I have. Edited for clarity. The actual aurora looks nothing like this when seen with the naked eye.The March 2024 total solar eclipse, captured from Brantford, Ontario.
Spring 2024 was an amazing time for celestial events in eastern Canada. First was the total solar eclipse, which tore a path right across the continent. Starting in Mexico, earth’s satellite cast its shadow north, across the land of the Free, escaped deadly violence and then entered Canada. Once there, it slunk across the country along the Great Lakes and the Saint Lawrence river, before exiting via the Maritime provinces.
My own home was outside the path of totality with the difference being just under 1%. That 1% though, makes all the difference. The sun is so bright that just 1% illuminance makes it bright enough to damage human eyesight. Bunny and I decided to drive to Brantford, about one hour south, placing ourselves firmly in the Moon’s shadow.
We would each head to the rendezvous point from different starting locations, hence needed two cars. Yes, emissions, I know. The ensuing confusion meant we were unable to actually meet and were separated by approximately 500 metres when I finally stopped driving. We were worried about cloud cover because the morning had un ciel nuageux, cloudy. As luck would have it, the clouds cleared well in time for the eclipse. We hit the roads.
Bunny arrived first and discovered, much to her annoyance, that the park she chose was also the chosen viewing spot of a gaggle of other people. This being Amérique du Nord, everyone drives and that meant a full parking lot. I wouldn’t make it before the time of totality, hence the last-minute decision for me to abandon the road and to look up.
And I am eternally grateful that look up I did because the celestial sphere put on a real show. Once the moon totally obscured the sun – a coincidence of identical relative sizes, by the way, not divine intervention – I saw the sun’s corona for only the second time in my life. The first was in Bahrain, in the early 2000s. Wow indeed.
I tried to take a few photos but soon gave up and just took it in. I stared in awe at the magnificence of a rare sight. The atmosphere of a star, hotter than its surface, for reasons that physics is yet to determine.
About two months later, the sun decided to belch up plasma in the direction of the earth. Solar plasma interacting with the earth’s magnetic field and atmosphere excites atoms and makes them emit radiation as visible light. The aurora borealis for me, because I live in the norther hemisphere.
Once again, this is a sight I have seen earlier. In this case, from Finland. That time, though, I lived in Helsinki, a city with lots of light pollution and so wasn’t able to see more than a few faint wisps of green.
This time, the solar storm was much stronger. Southern Ontario has relatively lower levels of light pollution outside the main cities and I live far enough away from Toronto that light pollution isn’t a difficult problem to solve. Southern Ontario, though, has a different problem – cloudy skies. This time, luck was on our side and the clouds – once again – cleared.
And what a sight it was, seeing the aurora dancing overheard. I must remind you that Southern Ontario, the region around the Great Lakes, is at roughly the same latitude as Andorra, Monaco or the south of France. Pretty far south, although the winters would have you believe we live close to the Arctic. The aurora overhead at these latitudes is rare.
I saw green and violet and I saw the aurora shifting with time, often every second. Truly a remarkable sight. My phone captured a vivid green glow. My DSLR camera did the same, however, being largely clueless as to how to operate that camera well, the photos I captured were not great. I forgot to set the aperture correctly. Anyhow, a lesson for another time.
Bunny did not attend this event but I fully recommend it to anyone reading. If you have the chance to see the aurora in person, take it. You will not regret it. Oh, and use you eyes. Leave the cameras be. Do it for the memories, not the Snaptokgram.
School systems back in the day recommended a transition of writing implements, from pencils to fountain pens. “Ink pens” was the name in the Indian school system and this sounds odd in hindsight. Ink as opposed to what, given that all pens use ink in some form. My childhood experience with fountain pens was horrible. No one taught me how to use them, how to properly hold them, how to apply the appropriate pressure and how to care for them. In typical Indian school system, it was a command sent down from on high, “Though shalt use a fountain pen henceforth”. And lo, it was so.
I used pens made by a Chinese brand “Hero”, legally Shanghai Hero Pen Company. According to Wikipedia, the pens are regarded as among the best in China and were popular in India during the 90s. The pens had a hooded nib and exposed only the very tip of the nib. I often used too much pressure and made the tines fray up to the point where ink either stopped flowing or sometimes gushed out. I learned through my misbehaving friends that ink would gush out if you angled the nib towards a victim and flicked the pen like a whip. This was a good example of how kids will weaponize the most innocuous items to be assholes. I too was an asshole. Anyhow, I often ended up with palms covered in ink, often wiped hours of writing by spilling water on paper and regularly ruined my white shirts with blue or black stains that would not wash away. The ink I used was made by Camlin and was horrible with the pen I used. I had no idea that pens came in different nib sizes, including fountain pens. I happened to use a fine-tipped pen and the ink clogged the feed and nib. I eventually flipped the nib and wrote with an inverted nib. This was a bad idea with cheap paper because the paper fibres clog the nib. I had no idea what the fibrous accumulations were, and I was loathe to touch the nib because I did not want ink on my fingers as well as palms. Mostly a bad experience.
Eventually, I discovered the convenience of ballpoint pens and switched to those for almost twenty years. I did not take pens too seriously and viewed most pens as the same. I scoffed at pens costing several thousand rupees or tens of dollars. Completely by accident, I purchased a pilot G-Tec from a stationery shop in Halifax, NS. I enjoyed this pen but it is a gel pen and the ink eventually runs out. I did not have a refill nor did I know how to find one so I eventually stopped using it before the refill ran out.
Then I visited Japan.
In the run up to the Japan trip, I scoured YouTube and reddit for must-buy things in Japan and one of these is Japanese stationary, including pens. The YouTube rabbit hole led me to fountain pens, to the American online store Jet Pens and eventually to the Toronto shop Wonder Pens. I was not able to complete my research quest before arriving in Japan and I don’t typically spend large amounts of money on things I may not use. I perused the options available in Japanese stationery stores and bought a few gel pens including refills. No fountain pens though, it seemed too daunting.
Back in Canada, I completed my online reading and visited Wonder Pens in Toronto. The kind folks there recommended I purchase a $35 Pilot Metropolitan and a bottle of Lamy blue ink. That kicked it off for me. The YouTube rabbit hole taught me how to hold a pen, how much pressure to apply and how to get the most out of the pen. I was hooked. I loved the feeling and i loved the fact that I could write more with less hand strain. I did not like the shade of the Lamy blue ink, it was too dark for my liking. I did the logical thing and bought a different bottle, this time from Ferris Wheel Press, a Canadian ink and pen manufacturer. This was from a shop in Brampton called Blesket. While in the shop, I saw these cheap Pilot Preppy fountain pens and bought one on a whim, the 03 nib. I loved this and visited a local art store in Guelph to find a 02 nib. I also bought a pen with red plastic and then decided that red ink was the next purchase. I now had four fountain pens and two bottles of ink!
With more written notes, I needed highlighters so I bought a six-pack from a shop in Cambridge called Phidon Pens. The ecosystem in Canada surprised me and I was delighted to see these shops thriving. Sure, the ink wasn’t cheap and the pens are 4x-5x the cost of the cheapest ballpoint pens but you can’t really put a price on joy, can you? My first Zebra highlighter ran out and I then discovered that Platinum make fountain pen-based highlighters. Ah, now I need highlighter ink so that was the next and most recent purchase, as you can see in the image below. The highlighter search showed me the Parallels pen by Pilot and I happened to find a few at Wyndham Art in Guelph. Of course, I bought the pen.
This entire experience taught me a whole lot about fountain pens but also about writing. You don’t need expensive fountain pens to enjoy them. Most of my fountain pens cost under six Canadian dollars, not exactly pricey. Same with the inks I purchase – they are cheap and come in colours I love! There is a certain joy in discovering new ink colours and seeing how the ink spreads on low quality paper. There is so much to learn – calligraphy, paper quality, pressure, nib styles, ink shades, ink colours, specialty inks and so on.
I encourage you to walk (or drive) to your local stationery store and buy a fountain pen. It is a joy!
I am a bandwagon fan of the English football club Liverpool FC. I watch some matches, I recognise a few players and am moderately emotionally invested in the club’s success. I do not live in the city of Liverpool or in the UK and have visited the place only twice. Why I support this club, I cannot say. Maybe it is an innate tribalism and this was one available choice at the time? That’s the likely explanation.
I recently visited the post-Brexit United Kingdom and made my way to Sport Direct, my favourite shop for cheap sports-themed goods. In the discount bin at the discount store, I found a couple of Premier League building block stadiums, one of which was Anfield – Liverpool’s home stadium.
This kit is sold in two models – the mini version and the full size one. The mini version has 1,369 pieces and the full-size version has 4,650 pieces. The larger version is more life-like, as you might expect. While in line at Sports Direct, I did not know that the larger version existed. Liverpool’s website sells the larger model for GBP 65, over one hundred Canadian dollarydoos, not a price I was (or am) willing to pay. I don’t love the club that much. I bought the mini set for about GBP 24, a much more palatable price.
I built the stadium model over approximately fifteen hours. The instructions were adequate but did not mention several pitfalls and alignment problems. The blocks themselves are small, much smaller than Lego blocks, and are fiddly to the point where you sometimes require tweezers. The block colours in the instructions are sometimes unclear. There are two shades of grey and one black and the printed colours are washed out, leading to some confusion. The attention to detail required for block placement is also a challenge, especially in a sloped stadium. The specific problem with this kit is the ascending white segments on the stands. Each is a 1 x 3 block with an overlap of 1 x 2 i.e. the blocks stack vertically, offset by one space to create the required staircase. The problem is that the entire stack is supported only at the bottom meaning that pressure anywhere above can split it. This has a tendency to happen often and there are nine such stacks. Annoying, to say the least.
Alignment is a problem when assembling the stadium roof, as you can see in my pictures here. It is fiddly and difficult to get right with the blocks in place. Too much pressure and blocks lower down just shoot off or parts of the structure collapse.
The small size of the blocks also means that some have imperfections from the injection moulding. The kit comes with sufficient spares so this is often not a problem but I did run into a few alignment challenges, again, as you can see on the stadium roof section.
In all, I enjoyed the assembly process and the assembled product looks great. There is a challenge but nothing too great. At the price I paid, I would recommend but cannot recommend this at full price because of the quality control issues.
Overall, 7/10 at the reduced price. 4/10 at full price.
My suggestions:
Look ahead and build stacks where you can. Good examples are the brown/orange stadium pillar sections.
When adding 1×1 blocks to the large, flat sections, look ahead and assemble those sections before attaching to the rest of the structure.
Assemble the white stacks in the stands first. Push each block as far back as it will go on the lower block i.e. aim for maximum length.
Note the alignment issues with the stadium roof girders.View showing the white sections of the stands. These sections are stacked 1×3 blocks with an overlap of 1×2. Note the misaligned (blurred) middle white stack on the left stand.View showing the “LFC” text built from blocks. This is a nice touch and is quite stable because the blocks integrate into the adjacent rows. I enjoyed this part of the finished stadium.
L – A Gacha-gacha rocket from the Miraikan science museum in Tokyo.
R – The assembled E233 Tokyo metro car
At the Toronto Anime North convention in 2022, I discovered nanoblock, the micro-sized building blocks made by a Japanese company called Kawada. They are small enough to be fiddly and unstable but give you tremendous satisfaction when you assemble them into a more concrete whole.
I was slightly taken aback by the prices – most sets are around fifteen Canadian dollary-doos. Remember that I am taken aback by any price that is not zero – after all, I am Indian. I bought two at the nanoblock store in Tokyo Skytree – admittedly, not the cheapest location.
One set was a model of the E233 trainset developed by Japanese train company JR East. The model I have is blue, to match the colours of the Keihin–Tōhoku line in Tokyo.
I decided to capture the building process in a time-lapse video. My YouTube game is weak, hence why there are few edits and the thumbnail is vertical. Both unforgivable errors. Straight to jail.
A second model that W purchased for me was of the N700 Shinkansen. Another timelapse video is below. The interesting aspect of these designs is that you can combine individual models into a train set. I love that!